body brushing tutorial turns nsfw
Article Plan: Body Brushing Tutorial Turns NSFW
A wellness practice, body brushing, has unexpectedly morphed into explicit online content, raising concerns about safety, objectification, and the influence of social media platforms.
Body brushing, a practice rooted in Ayurvedic traditions, experienced a significant surge in popularity in recent years, initially championed within the health and wellness community. Promoted for its purported detoxification and skin-enhancing benefits, it quickly gained traction as a self-care ritual. Individuals shared routines and positive experiences, fostering a growing online presence centered around this simple, accessible practice.
However, this seemingly innocuous trend has taken a startling turn. What began as a focus on well-being has increasingly intersected with explicit content creation, particularly on platforms like TikTok and other social media channels. This shift has sparked debate and concern, prompting questions about the sexualization of self-care and the potential risks associated with the evolving nature of online trends. The initial appeal has been overshadowed by a concerning new dynamic.
What is Dry Brushing? ─ A Basic Overview
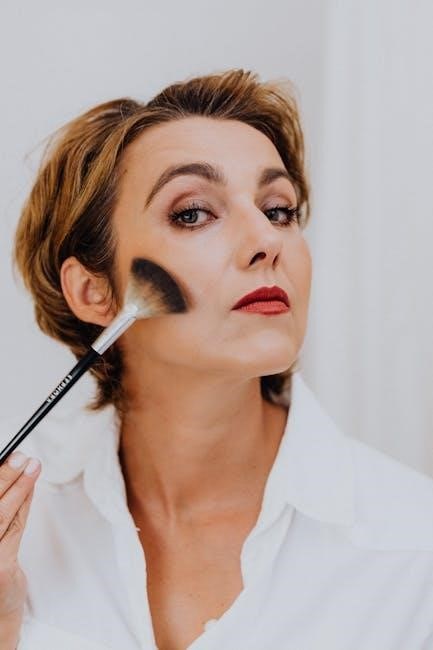
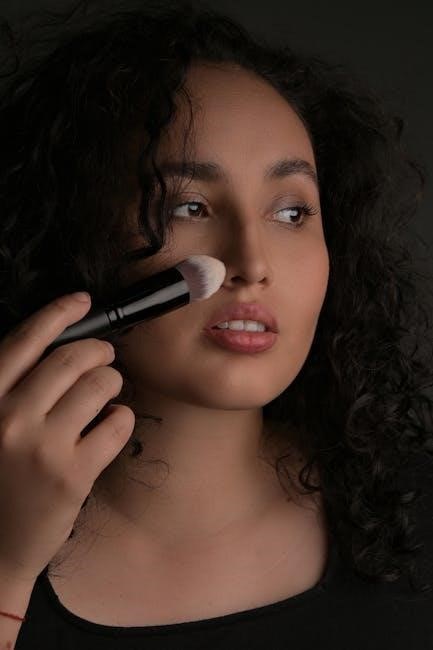
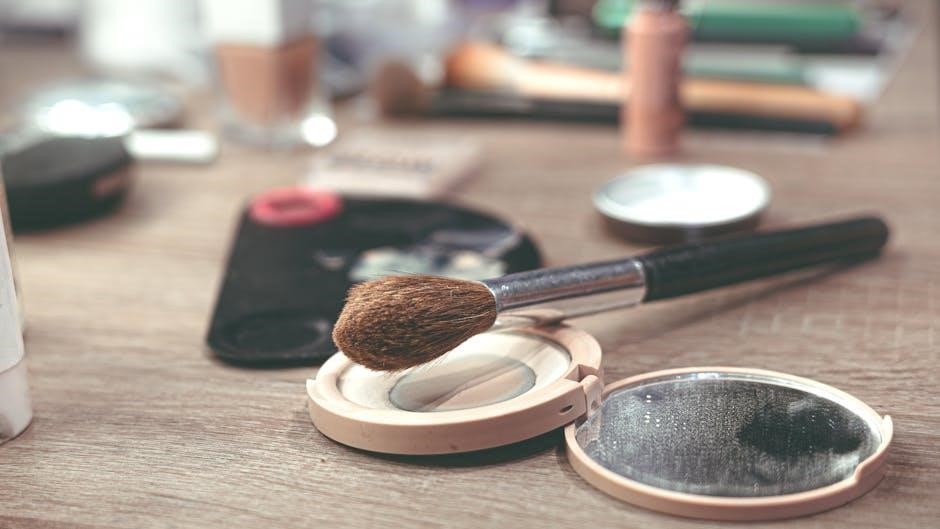
Dry brushing involves using a natural-bristled brush to gently exfoliate the skin, typically performed on dry skin before showering. The technique generally begins at the feet, utilizing long, sweeping motions towards the heart, and then circular motions on the torso and back. It’s recommended to use light pressure to avoid irritation or trauma to the skin.
The core principle revolves around stimulating the lymphatic system and removing dead skin cells; A few overlapping swipes are usually sufficient; excessive brushing can be detrimental. While often presented as a simple wellness practice, the technique’s recent appropriation into explicit content has drastically altered its perception. Understanding the foundational technique is crucial when examining its current online trajectory.
The Initial Appeal: Health & Wellness Benefits

Initially, dry brushing gained popularity as a holistic wellness practice touted for its purported health benefits. Central to this appeal were claims of enhanced exfoliation, leading to smoother, healthier-looking skin. Proponents also emphasized potential lymphatic drainage, suggesting it could reduce bloating and support detoxification.
The practice was marketed as a simple, affordable self-care ritual easily incorporated into a daily routine. This resonated with individuals seeking natural approaches to skincare and overall well-being. However, these benefits, while appealing, formed the foundation upon which a more problematic trend began to build, ultimately leading to its unexpected sexualization online.
Exfoliation and Skin Health
Dry brushing’s primary advertised benefit centers around its exfoliating properties. The act of brushing removes dead skin cells, revealing smoother skin underneath and potentially improving circulation. This exfoliation can allow for better absorption of moisturizers and other skincare products, enhancing their effectiveness.
Advocates claim regular dry brushing can minimize the appearance of cellulite, though scientific evidence supporting this is limited. The physical stimulation from the bristles was initially presented as a way to promote healthier skin texture and tone, contributing to a feeling of revitalization. This focus on skin health was a key component of its initial appeal before the shift towards explicit content occurred.
Lymphatic Drainage Claims
A central tenet of the initial body brushing hype revolved around claims of lymphatic drainage. Proponents asserted that the brushing motion stimulates the lymphatic system, aiding in detoxification and boosting the immune system. The lymphatic system plays a crucial role in removing waste and toxins from the body, and it was suggested that dry brushing could enhance this natural process.
However, it’s important to note that these claims are largely unsubstantiated by robust scientific research. While gentle massage can support lymphatic flow, the extent to which dry brushing achieves significant lymphatic drainage remains debated. Despite the lack of conclusive evidence, the idea of detoxification contributed significantly to the wellness trend’s popularity.
The Shift: From Wellness to Explicit Content
The transition from a health-focused practice to explicit content was gradual, yet stark. Initially, body brushing tutorials showcased proper technique for wellness benefits. However, a noticeable shift occurred as creators began focusing on the visual aspects of the practice, emphasizing skin texture and body contours. This subtle change paved the way for more suggestive content.

The emphasis moved from health to aesthetics, and eventually, to outright sexualization. Tutorials began featuring increasingly revealing clothing, provocative poses, and suggestive movements. This transformation was largely driven by the pursuit of views and engagement on platforms prioritizing sensational content, ultimately distorting the original intent.
Platforms Fueling the Trend ─ TikTok & Social Media
TikTok emerged as a primary catalyst, with its algorithm favoring engaging, often sensational, content. Short-form video format allowed for quick dissemination of body brushing tutorials, rapidly escalating into explicit variations. The platform’s “For You” page amplified these videos, exposing them to a vast audience and encouraging imitation.
Other social media platforms, like Instagram and Twitter, also contributed, though to a lesser extent. The ease of sharing and the pursuit of viral trends incentivized creators to push boundaries. Lack of consistent content moderation across these platforms allowed the explicit trend to flourish, creating an echo chamber of suggestive material and normalizing its consumption.
The “NSFW” Element: How Brushing Became Sexualized
The initial wellness focus gradually eroded as creators began emphasizing visual stimulation and focusing on sensitive areas of the body. What started as a skincare routine transformed into content with overt sexual undertones, often featuring suggestive movements and camera angles.
This sexualization was fueled by the desire for views and engagement, with creators exploiting the inherent intimacy of the act. The emphasis shifted from health benefits to aesthetic appeal, specifically catering to a male gaze. Explicit content often highlighted the skin’s texture and the physical sensations associated with brushing, blurring the lines between self-care and sexual performance.
Specific Techniques Featured in Explicit Content
A key element involves a pronounced focus on sensitive areas, like the breasts, inner thighs, and buttocks, often brushed with slow, deliberate strokes. Creators frequently demonstrate circular motions on the torso and back, but with exaggerated movements intended for visual impact rather than lymphatic drainage.
Emphasis is placed on showcasing skin texture and the resulting flush, utilizing lighting and camera angles to maximize aesthetic appeal. Some content features the use of coffee scrubs, like Frank Body, alongside brushing, further enhancing the visual and tactile elements. These techniques prioritize visual stimulation over the original health benefits, contributing to the content’s explicit nature.
Focus on Sensitive Areas
Explicit content consistently highlights brushing on highly sensitive areas – breasts, inner thighs, and the buttocks – deviating significantly from traditional wellness practices. These areas are often showcased with prolonged, deliberate strokes, emphasizing tactile sensation and visual appeal over purported health benefits.
The framing of these techniques often involves suggestive camera angles and lighting, drawing attention to the skin’s reaction to brushing. This deliberate focus transforms a self-care ritual into a source of sexualized content. Creators often demonstrate these techniques with minimal clothing, further amplifying the explicit nature and contributing to the objectification of the body.
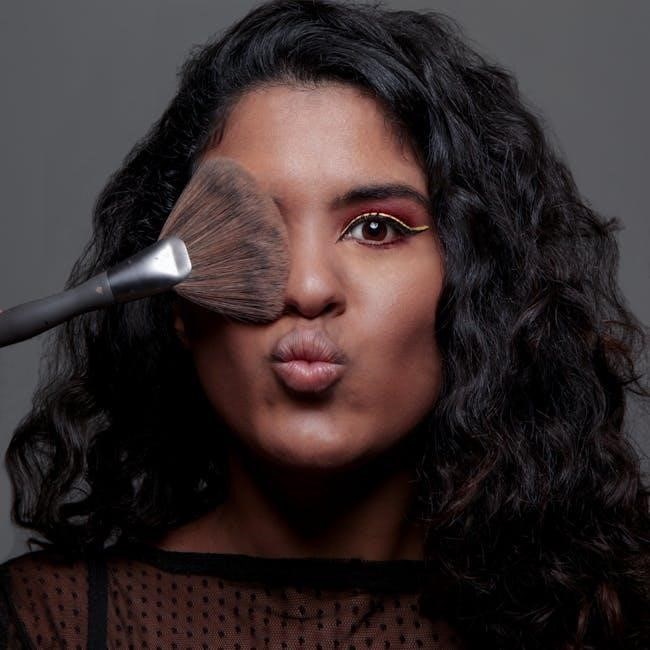
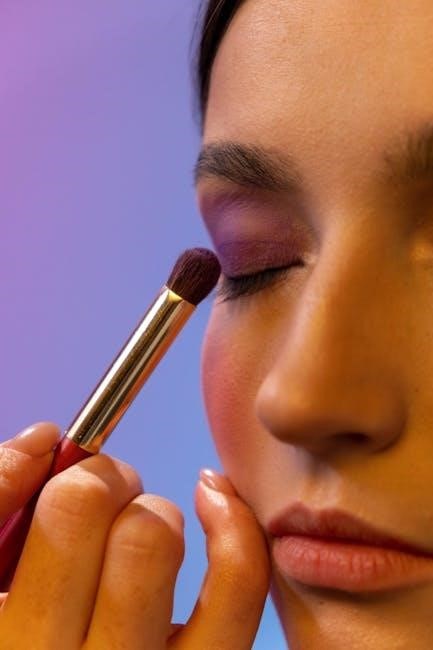
Emphasis on Visual Stimulation
A core element of the trend involves maximizing visual stimulation through slow-motion footage, close-up shots of skin texture, and deliberate movements during brushing. The focus shifts from the act of exfoliation to the aesthetic presentation of the body, prioritizing visual impact over any health-related claims.
Creators frequently utilize lighting techniques to accentuate skin contours and highlight the brush’s interaction with the body. The content often features exaggerated reactions and expressions, designed to elicit a response from viewers. This emphasis on visual appeal transforms a simple skincare routine into a performance geared towards generating engagement and views, often crossing into explicit territory.
Safety Concerns: Physical Risks of Improper Brushing
Beyond the psychological impacts, improper dry brushing carries genuine physical risks. Aggressive scrubbing or using brushes with overly stiff bristles can cause skin irritation, redness, and even micro-tears. Individuals with sensitive skin, eczema, or psoriasis are particularly vulnerable to these adverse effects.
The recommended technique – long, gentle strokes – is often disregarded in content prioritizing visual impact, leading to potential trauma. Furthermore, the trend’s association with electrical devices introduces a significant hazard, as brushing can increase the risk of electric shock if the body is grounded, especially when combined with water exposure. Ignoring these risks can lead to serious injury.
Electrical Safety Warnings & Body Brushing
The convergence of dry brushing with electrical devices presents a serious, often overlooked, safety concern. Dry skin significantly reduces electrical resistance, and brushing can further lower it, increasing the risk of shock if the body is earthed or grounded. Contact with grounded surfaces – pipes, radiators, cookers – while brushing amplifies this danger.
Content creators often fail to adequately warn viewers about this hazard. Even with safety devices, residual risks remain. Avoiding water exposure during and immediately after brushing is crucial. Manufacturers emphasize the importance of following safety instructions and avoiding use in wet conditions to prevent electrical hazards and potential injury.
Grounding and Electric Shock Risk
The risk of electric shock dramatically increases when the body is grounded during dry brushing. Grounding occurs through contact with conductive materials like plumbing, electrical appliances, or even damp floors. Dry brushing removes layers of skin, lowering electrical resistance and making the body a more effective conductor.
This creates a pathway for electricity to flow through the body to the ground, potentially causing severe injury or even death. Content featuring brushing near electrical sources, or without explicitly warning against grounding, is particularly dangerous. Residual risks persist even with safety devices; complete avoidance of grounding is paramount. Awareness and caution are vital to prevent accidental electrocution.
Avoiding Water Exposure with Electrical Devices
Combining body brushing with the presence of water and electrical devices presents a life-threatening hazard. Water significantly increases electrical conductivity, turning seemingly harmless situations into potentially fatal ones. Never use electrical tools or appliances in wet or damp environments, and ensure hands and skin are completely dry before handling them.
The risk isn’t limited to direct water contact; humidity also elevates the danger. Content creators must explicitly discourage any proximity between brushing and electrical sources. Even following safety instructions doesn’t eliminate all risk. Protecting oneself from electric shock requires diligent avoidance of water exposure near any electrical device, prioritizing safety above all else.

Psychological Impact: Objectification & Body Image
The sexualization of body brushing contributes to the broader issue of objectification, reducing individuals to their physical forms for online consumption. This trend can foster unrealistic beauty standards and negatively impact body image, particularly among vulnerable viewers. The focus shifts from self-care and wellness to visual stimulation and performance, potentially leading to feelings of inadequacy and self-consciousness.
Exposure to highly curated and often unrealistic depictions of bodies can exacerbate existing insecurities. The emphasis on specific techniques within explicit content further reinforces the idea that bodies must be presented in a certain way to be desirable, perpetuating harmful societal pressures.
The Role of Coffee Scrubs in Related Content (Frank Body Example)
Coffee scrubs, notably brands like Frank Body, frequently appear alongside body brushing in related online content, often amplifying the aesthetic and sensual aspects. Users share experiences spanning a decade of consistent use without drain clogging, suggesting a perceived safety regarding product application. The texture and visual appeal of coffee scrubs contribute to the overall presentation, enhancing the focus on skin and body contours.
This pairing often extends beyond simple skincare routines, becoming integrated into more suggestive or explicit displays. The association with a popular brand like Frank Body can normalize and even glamorize the trend, attracting a wider audience and potentially blurring the lines between wellness and sexualization.
Drain Clogging Concerns & Mitigation
A significant concern arising from the increased popularity of body brushing and accompanying scrubs, like coffee-based products, is the potential for drain clogging. While some users report years of consistent use without issues, the accumulation of exfoliated skin and scrub particles can undoubtedly lead to blockages over time.

Mitigation strategies are crucial. These include utilizing fine-mesh strainers in shower drains to capture debris, regularly flushing drains with hot water, and avoiding excessive amounts of scrub. Preventative maintenance, such as enzymatic drain cleaners, can also help break down organic matter. Ignoring these precautions risks costly plumbing repairs and inconvenience.
Legal and Ethical Considerations
The sexualization of body brushing raises complex legal and ethical dilemmas, particularly concerning the creation and distribution of explicit content. Issues of consent, exploitation, and the potential for trafficking are paramount. Platforms hosting such content face scrutiny regarding their responsibility to protect users and enforce community guidelines.
Furthermore, the depiction of potentially unsafe practices, like brushing near electrical devices, introduces liability concerns for content creators and platforms. Ethical considerations extend to the objectification of bodies and the promotion of unrealistic beauty standards. Legal frameworks surrounding obscenity and online safety are constantly evolving, adding to the complexity of this issue.
Content Moderation Challenges on Social Media
Moderating the surge of explicit body brushing content presents significant challenges for social media platforms. The sheer volume of uploads, coupled with the evolving nature of the trend, overwhelms existing moderation systems. Identifying nuanced violations of community guidelines – distinguishing between wellness content and sexualized depictions – requires sophisticated algorithms and human review.
Furthermore, the use of coded language and visual cues to circumvent detection complicates efforts. Platforms struggle to balance freedom of expression with the need to protect users from harmful content and potential exploitation. Reactive moderation, relying on user reports, often proves insufficient, demanding proactive strategies and improved content filtering technologies.
The transformation of body brushing from a wellness practice to a source of explicit content highlights the unpredictable nature of online trends and their potential for exploitation. Addressing this requires a multi-faceted approach, encompassing platform accountability, user education, and a critical examination of societal pressures surrounding body image.
Prioritizing safety – both physical, regarding electrical hazards, and psychological, concerning objectification – is paramount. Open conversations about responsible online behavior and the potential risks associated with this trend are crucial. Ultimately, navigating these complexities demands a collective effort to foster a healthier and more mindful online environment.