cherrypickers’ guide pdf download free
Article Plan: Cherry Pickers Guide PDF Download Free
This comprehensive article details accessing free PDF guides for cherry pickers, covering safety, operation, maintenance, and legal compliance․
It emphasizes ECIA guidelines and PPE requirements․
Cherry pickers, also known as boom lifts or aerial work platforms, are essential machinery in various industries, including construction and maintenance․
This guide serves as a central resource for anyone seeking to understand these machines and operate them safely․
We’ll explore readily available, free PDF resources, focusing on crucial aspects like pre-operational checks, emergency protocols, and adherence to health & safety standards – particularly the ECIA guide․
Understanding safe work procedures (SWP) and proper personal protective equipment (PPE) is paramount․
This guide aims to empower operators and supervisors with the knowledge to mitigate risks associated with working at heights, ensuring a secure and compliant work environment․
What is a Cherry Picker? (Definition & Uses)
A cherry picker is a type of aerial work platform (AWP) designed to lift personnel to elevated heights․ The name originates from their initial use in orchards for fruit picking․
Today, they are indispensable in construction, maintenance, tree care, and various industrial applications․ These machines provide access to hard-to-reach areas, increasing efficiency and safety compared to traditional methods like ladders or scaffolding․

Cherry pickers come in diverse forms, each suited for specific tasks․
They enable tasks like electrical repairs, sign installation, and building inspections․ Understanding their capabilities and limitations is crucial, as highlighted in available safety guides and method statements for working at heights․
Why Download a Cherry Picker Guide?
Downloading a cherry picker guide is paramount for safety and compliance․ These guides, often available as free PDFs, detail crucial pre-operational checks, safe operating procedures, and emergency protocols․
They emphasize the importance of understanding load limits, avoiding obstructions, and utilizing appropriate Personal Protective Equipment (PPE) like hard hats and safety harnesses․
Guides also cover legal regulations and standards, such as those outlined by the ECIA․
Accessing these resources minimizes risks of trapping, crushing, and other potential hazards, ensuring a secure working environment․ Method statements and SWPs are also readily available․

Types of Cherry Pickers
Cherry pickers, also known as aerial work platforms, come in several key types․ Telescopic boom lifts offer extended horizontal reach, ideal for covering large areas․ Articulating boom lifts provide greater maneuverability around obstacles, excelling in complex environments․
Scissor lifts, while often used for similar tasks, aren’t always categorized as traditional cherry pickers due to their vertical-only movement․ Understanding these distinctions is vital when selecting the right equipment․ Guides detail the specific safety considerations for each type, ensuring appropriate operation and hazard mitigation․
Telescopic Boom Lifts
Telescopic boom lifts are characterized by their extending, multi-section booms, providing significant horizontal outreach․ These machines excel in applications requiring access over obstacles or across expansive areas, like construction sites or large warehouses․
A comprehensive guide will highlight the importance of understanding load capacity and boom extension limitations․ Safe operation necessitates careful consideration of ground conditions and wind speed․ Proper pre-operational checks, focusing on hydraulic systems, are crucial․ Detailed PDFs offer insights into maximizing efficiency while prioritizing operator safety․
Articulating Boom Lifts
Articulating boom lifts, also known as knuckle booms, feature multiple hinged sections, granting exceptional maneuverability in confined spaces․ They are ideal for navigating around obstacles, making them invaluable for indoor maintenance and complex outdoor tasks․
A detailed cherry picker guide PDF will emphasize the importance of understanding articulation points and their impact on reach․ Safe operation requires awareness of pinch points and proper positioning․ Pre-operational checks should prioritize boom functionality and hydraulic integrity․ These guides provide crucial information for maximizing productivity and ensuring operator wellbeing․
Scissor Lifts – Are They Cherry Pickers?
While often grouped with them, scissor lifts aren’t technically cherry pickers․ Cherry pickers (boom lifts) offer extending and articulating platforms, providing greater reach and maneuverability․ Scissor lifts, conversely, raise and lower vertically, ideal for tasks requiring large platform areas at consistent heights;
A comprehensive cherry picker guide PDF will clarify these distinctions, focusing on the specific safety protocols for each type․ Understanding load limits and stability is crucial․ Though different, both require thorough pre-operational checks and adherence to safety standards, ensuring a safe working environment․
Finding Free Cherry Picker Guides (PDF)
Locating reliable, free cherry picker guides in PDF format requires knowing where to look․ Reputable online sources, like occupational safety and health websites, frequently offer downloadable resources․ Manufacturer websites often have dedicated download sections containing operation manuals and safety guides․
Furthermore, safety organizations, such as the ECIA, provide valuable guides outlining health and safety precautions․ Searching for “method statement for working at heights using cherry pickers” yields relevant documents․ Always verify the source’s credibility before downloading and utilizing any guide․
Reputable Online Sources
Several online platforms consistently provide trustworthy cherry picker guides in PDF format․ Websites dedicated to occupational safety and health, like those focusing on construction safety, are excellent starting points․ Construction Digital highlights ECIA guidelines, crucial for safe operation․
Additionally, platforms hosting safety documents, such as those offering method statements for working at heights, frequently contain relevant PDFs․ Prioritize sources with clear authorship, recent publication dates, and a focus on comprehensive safety procedures․ Always cross-reference information for accuracy․
Manufacturer Websites (Download Sections)
Directly accessing manufacturer websites is a prime strategy for obtaining official cherry picker guides in PDF format․ These resources often include detailed operation manuals, safety guidelines, and maintenance schedules specific to their equipment․
Look for dedicated “Downloads,” “Resources,” or “Support” sections on the manufacturer’s site․ These areas typically house a library of documentation․ Concord Access Solutions exemplifies this approach․ Ensure the downloaded guide corresponds to the exact model of cherry picker being used for optimal safety and operational understanding․
Safety Organization Resources
Numerous safety organizations provide valuable, often free, cherry picker guides in PDF format․ These resources prioritize safe operating procedures and hazard awareness․ The Engineering Construction Industry Association (ECIA) is a key source, offering guidance on preventing trapping and crushing injuries – critical considerations for construction employees․
Occupational Safety and Health administrations frequently publish method statements and safe work procedures (SWP) related to cherry picker operation, emphasizing PPE and operator training․ These documents are invaluable for establishing robust safety protocols and ensuring legal compliance․
Key Sections in a Comprehensive Cherry Picker Guide
A truly useful cherry picker guide, often available as a PDF download, must cover several essential areas․ These include detailed pre-operational checks – hydraulic systems, boom integrity, and tire condition – alongside safe operating procedures, emphasizing load limits and hazard avoidance․
Essential sections also detail required Personal Protective Equipment (PPE), emergency protocols (power failure, rescue), and after-work checklists for maintenance․ Furthermore, a guide should outline method statements for working at heights and address relevant legal regulations․
Pre-Operational Checks & Inspections
Before each use, thorough pre-operational checks are vital for safe cherry picker operation․ This begins with checking hydraulic systems for leaks and proper function․ Next, a meticulous inspection of the boom and platform is crucial, looking for any damage or wear․
Tire condition and overall stability must also be verified, ensuring adequate tread and proper inflation․ These inspections, detailed in downloadable guides, minimize risks of mechanical failure and contribute significantly to operator safety and prevent accidents․
Checking Hydraulic Systems
Hydraulic system checks are paramount before operating a cherry picker․ Begin by visually inspecting hoses, fittings, and the reservoir for any signs of leaks – even small drips indicate potential problems․ Verify the hydraulic fluid level is within the recommended range, referencing the operator’s manual․
Test all functions – raising, lowering, tilting, and rotating – observing for smooth, consistent operation․ Any unusual noises or jerky movements warrant immediate investigation․ Proper hydraulic function is essential for controlled movement and safe operation․
Inspecting the Boom & Platform
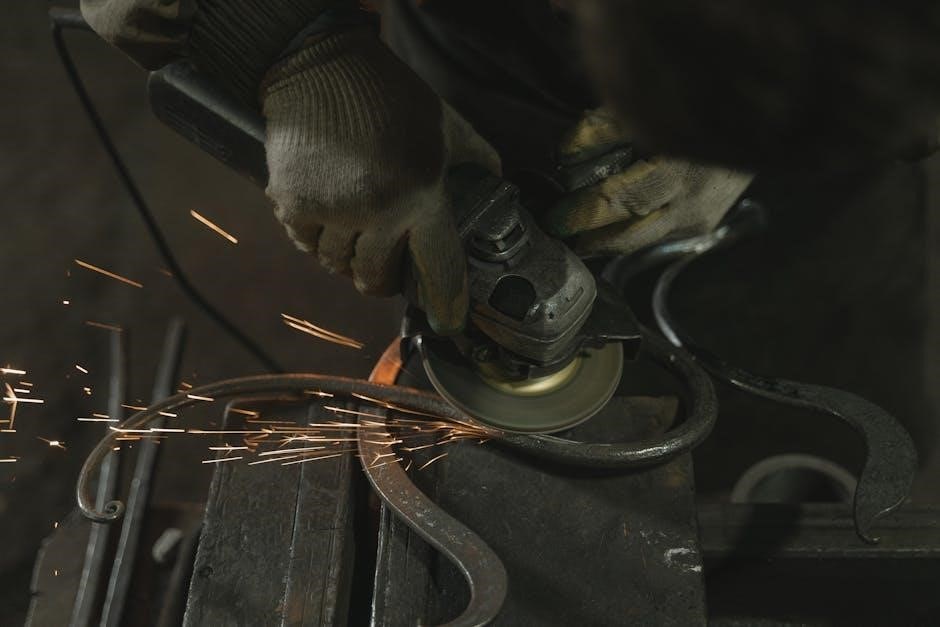
A thorough boom and platform inspection is critical for operator safety․ Carefully examine the boom sections for any signs of damage – dents, cracks, or corrosion – which could compromise structural integrity․ Check all pins and locking mechanisms to ensure they are securely fastened and functioning correctly․
Inspect the platform for any defects, ensuring the floor is solid and guardrails are intact․ Verify the emergency stop button is accessible and operational․ A damaged boom or platform presents a significant hazard․
Tire Condition & Stability
Proper tire condition is paramount for cherry picker stability․ Before each use, inspect tires for adequate inflation, cuts, bulges, or uneven wear․ Underinflated tires significantly reduce stability and increase the risk of tipping․ Ensure all tires are in good working order and match in size and type․
Assess the ground conditions where the cherry picker will operate․ Uneven or soft ground can compromise stability․ Utilize outriggers, if equipped, and always follow manufacturer’s guidelines for setup and operation to maintain a stable working platform․
Safe Operating Procedures
Adhering to safe operating procedures is crucial when using cherry pickers․ Always understand and respect the machine’s load limits, never exceeding the maximum capacity․ Proper positioning and setup on a level surface are essential for stability․ Before elevating, ensure the area is clear of obstructions and potential hazards like power lines․
Maintain a safe distance from structures and personnel․ Operators must receive thorough training and follow established method statements for working at heights, prioritizing safety at all times․
Understanding Load Limits
Cherry picker load limits are paramount for safe operation․ Exceeding these limits compromises stability and increases the risk of tipping or structural failure․ The platform capacity includes personnel, tools, and materials – all must be accounted for․ Always consult the manufacturer’s specifications detailed in the operator’s manual for precise weight restrictions․
Regularly verify the load weight before and during operation․ Never attempt to lift loads beyond the rated capacity, and distribute weight evenly across the platform to maintain balance and prevent instability․
Proper Positioning & Setup
Correct positioning and setup are crucial for cherry picker stability․ Ensure the machine is on a firm, level surface, free from obstructions and soft ground․ Outriggers, if equipped, must be fully extended and leveled before operation, distributing the weight effectively․
Maintain a safe distance from overhead power lines and other potential hazards․ Assess the work area for obstacles and plan the lift path accordingly․ Proper setup minimizes the risk of tipping, collisions, and electrical hazards, ensuring a safe working environment․
Avoiding Obstructions & Hazards
Prior to operation, thoroughly assess the work area for potential obstructions and hazards․ This includes overhead power lines, structures, and nearby personnel․ Maintain a safe operating distance from all identified hazards, adhering to established safety regulations․
Be aware of wind conditions, as strong gusts can affect stability․ Implement clear communication protocols to alert personnel of the cherry picker’s movement․ Regularly scan the surroundings during operation to identify and avoid newly arising hazards, ensuring a safe and productive work environment․
Personal Protective Equipment (PPE)
Mandatory PPE is crucial when operating or working near cherry pickers․ Hard hats are essential to protect against head injuries from falling objects․ Safety glasses shield eyes from debris․ Safety harnesses and lanyards are vital for fall protection, securing operators within the platform․

Appropriate footwear, specifically safety boots, provides foot protection and enhances stability․ Always inspect PPE before each use, ensuring it’s in good condition․ Proper PPE usage significantly reduces the risk of injuries during aerial work operations․

Hard Hats & Safety Glasses
Hard hats are a non-negotiable PPE requirement when working with or around cherry pickers, safeguarding against potential head injuries from falling objects or contact with overhead structures․ Ensure the hard hat fits securely and is in good working condition, free from cracks or damage․
Safety glasses are equally vital, protecting eyes from dust, debris, and accidental splashes․ Choose glasses with side shields for comprehensive protection․ Regularly inspect safety glasses for scratches or damage, replacing them when necessary․ Consistent use of both dramatically reduces workplace eye and head injury risks․
Safety Harnesses & Lanyards
Full-body safety harnesses are crucial for preventing falls from elevated platforms․ Ensure the harness is properly fitted and adjusted for each operator, distributing force effectively in case of a fall․ Lanyards connect the harness to a secure anchor point on the cherry picker, limiting fall distance․
Inspect harnesses and lanyards before each use for wear, tear, or damage․ Use only compatible components and follow manufacturer’s guidelines․ Proper training on harness donning, adjustment, and lanyard use is essential for maximizing safety and minimizing fall risks․
Appropriate Footwear (Safety Boots)
Robust safety boots are non-negotiable when operating cherry pickers, protecting feet from falling objects and potential hazards on the platform․ Boots should feature steel toe caps for impact resistance and slip-resistant soles for secure footing on various surfaces․
Ensure boots provide adequate ankle support, crucial for stability while working at height․ Regularly inspect boots for damage, such as cracks or worn soles․ Avoid footwear with heels or open toes, as they compromise safety․ Proper footwear contributes significantly to operator safety and prevents workplace injuries․
Emergency Procedures
Comprehensive emergency protocols are vital for safe cherry picker operation․ Power failure procedures must be clearly defined, including manual lowering mechanisms and communication strategies․ Rescue operations require trained personnel and appropriate equipment for platform descent․
All incidents, even minor ones, must be reported immediately following established procedures․ Regular drills should be conducted to ensure operators are familiar with emergency responses․ A detailed plan minimizes risks and ensures swift, effective action during unforeseen events, safeguarding operator well-being․
Power Failure Protocols
In the event of power loss, immediate action is crucial․ Operators must immediately engage the emergency lowering system, typically a manually operated pump or descent control․ Clear communication with ground personnel is paramount, informing them of the situation and intended actions․

Regular training on emergency lowering procedures is essential․ Ensure the system is regularly inspected and maintained․ A backup power source, if available, should be tested periodically․ Prioritize a controlled descent, avoiding abrupt movements, to ensure operator safety during a power failure scenario․

Rescue Operations & Lowering Procedures

Effective rescue plans are vital when a cherry picker malfunction prevents normal descent․ Ground personnel should be trained in rescue techniques, including the use of secondary lowering systems․ A designated rescue team, equipped with appropriate tools, must be readily available․
Lowering procedures should prioritize a slow, controlled descent, minimizing swing or impact․ Communication between the operator and rescue team is critical․ Regular drills ensure preparedness․ Always follow manufacturer’s guidelines for emergency lowering, and document all rescue attempts thoroughly․
Reporting Accidents & Incidents
Prompt and thorough reporting of all accidents and incidents involving cherry pickers is legally mandated and crucial for preventing recurrence․ Detailed reports should include the date, time, location, individuals involved, and a comprehensive description of the event․
Internal reporting procedures must be established, alongside compliance with relevant regulatory bodies․ Investigation should identify root causes and implement corrective actions․ Documentation is key for legal defense and insurance claims․ Always prioritize safety and transparency in all reporting efforts․
Method Statements for Working at Heights with Cherry Pickers
Detailed method statements are essential for safe work at height utilizing cherry pickers․ These documents outline step-by-step procedures, hazard identification, risk assessments, and control measures․ They specify equipment requirements, PPE usage, and emergency protocols․
A robust method statement ensures all personnel understand their roles and responsibilities․ It should address pre-operational checks, safe positioning, load limits, and communication protocols․ Regular review and updates are vital, reflecting site-specific conditions and evolving safety standards․ Compliance with these statements is paramount․

Health & Safety Standards (ECIA Guide Reference)
Adhering to robust health and safety standards is crucial when operating cherry pickers, particularly within construction environments․ The Engineering Construction Industry Association (ECIA) guide provides vital precautions to prevent trapping and crushing injuries – common risks associated with these machines․
This guide emphasizes thorough risk assessments, safe system of work implementation, and comprehensive operator training․ It details procedures for identifying and mitigating hazards, ensuring a safe working environment․ Regularly referencing and implementing the ECIA guidelines is essential for legal compliance and worker wellbeing․
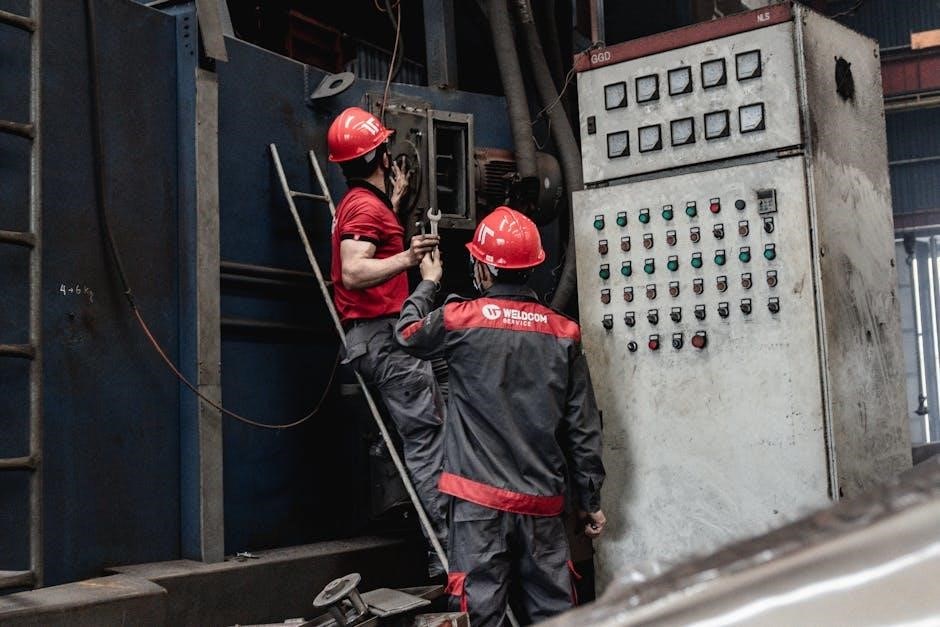
Training & Certification Requirements
Proper training and certification are non-negotiable for anyone operating a cherry picker․ Comprehensive training programs should cover pre-operational checks, safe operating procedures, emergency protocols, and hazard recognition․ Operators must understand load limits, stability considerations, and the correct use of personal protective equipment (PPE)․
Certification demonstrates competency and adherence to industry standards․ Many regions require formal certification before an individual can legally operate this equipment․ Regular refresher courses are vital to maintain skills and stay updated on safety regulations, ensuring a safe and compliant work environment․
Common Hazards Associated with Cherry Picker Use
Cherry picker operation presents significant hazards requiring diligent mitigation․ Potential dangers include falls from height, being struck by objects, electrical contact with overhead power lines, and equipment malfunction․ Tip-overs due to unstable ground or improper setup are also a serious concern․ Crushing hazards exist from the boom’s movement and platform operation․
Wind speed significantly impacts stability, and exceeding limits can lead to accidents․ Insufficient PPE, like lacking a safety harness, dramatically increases risk․ Inadequate training contributes to operator error and unsafe practices․ Regular hazard assessments are crucial for proactive safety management․
After-Work Checklists & Maintenance
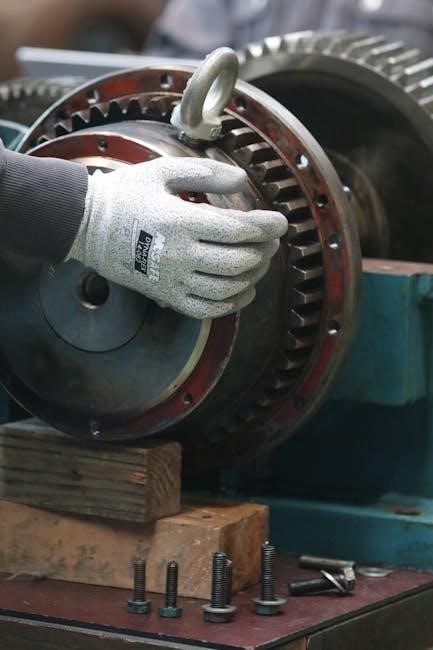
Post-operation checklists are vital for ensuring continued cherry picker safety and longevity․ These should include inspecting the boom for damage, verifying hydraulic fluid levels, and checking tire condition․ Confirming all safety devices are functioning correctly is paramount․ Regular maintenance, as per the manufacturer’s guidelines, prevents breakdowns․
Scheduled servicing should encompass thorough inspections of wiring, hoses, and structural components․ Promptly address any identified issues to avoid escalation․ Maintaining detailed records of all maintenance activities is crucial for compliance and tracking performance․ Proper storage protects the equipment from the elements․
Legal Regulations & Compliance
Operating cherry pickers demands strict adherence to local and national safety regulations․ Compliance with standards like those referenced by the ECIA guide is non-negotiable․ Operators must be fully aware of relevant legislation regarding working at heights and mobile elevated work platforms (MEWPs)․ Regularly review updated regulations to ensure ongoing conformity․
Documentation, including operator certifications and maintenance records, must be readily available for inspection․ Failure to comply can result in hefty fines and legal repercussions․ Understanding SWP (Safe Work Procedures) is essential for a legally sound operation․ Prioritize safety and legal adherence above all else․
Cherry Picker SWP (Safe Work Procedures)
A robust Cherry Picker SWP (Safe Work Procedure) is paramount for hazard mitigation․ These procedures detail pre-operational checks, safe positioning, and emergency protocols․ Emphasis is placed on proper harness usage and adherence to load limits․ The SWP outlines responsibilities for operators, spotters, and ground personnel․
Detailed instructions cover power failure responses and rescue operations․ Regular review and updates are crucial to reflect changing conditions and best practices․ Proper training on the SWP is mandatory for all personnel involved․ Following these procedures minimizes risk and ensures a safe working environment․
Selecting a Reliable Cherry Picker Supplier
Choosing a reputable cherry picker supplier is critical for safety and efficiency․ Prioritize suppliers offering well-maintained equipment and comprehensive training programs․ Look for companies providing detailed documentation, including operator manuals and safety guidelines․ Ensure the supplier offers responsive support and readily available spare parts․
A reliable supplier will prioritize safety certifications and compliance with industry standards․ Consider their experience and track record in providing suitable machinery for your specific application․ Verify their commitment to ongoing maintenance and inspections․ Selecting wisely minimizes downtime and maximizes operational effectiveness․
Understanding Cherry Picker Controls
Familiarity with cherry picker controls is paramount for safe operation․ Most models feature intuitive joystick controls for boom movement, elevation, and platform rotation․ Operators must understand the function of each control before operation, referencing the manufacturer’s manual․ Emergency stop buttons are crucial and should be easily accessible․
Learn to identify and operate auxiliary functions like platform tilt and secondary guarding systems․ Proper control usage prevents sudden movements and ensures precise positioning․ Regular training reinforces control understanding and promotes safe working practices, minimizing risks during aerial work․
Wind Speed Limitations & Operation
Cherry picker operation is heavily restricted by wind speed․ Manufacturers specify maximum allowable wind speeds, typically around 23-28 mph, but this varies by model․ Exceeding these limits creates instability, increasing the risk of tipping or loss of control․ Operators must always check wind conditions before and during operation using an anemometer․
If wind speeds approach the limit, work should be suspended, and the platform lowered․ Awareness of gusts and changing conditions is vital․ Ignoring wind limitations is a major safety hazard, potentially leading to serious accidents and equipment damage․
Ground Conditions & Stability Considerations
Stable ground is paramount for safe cherry picker operation․ Operators must assess the ground’s load-bearing capacity before setup, avoiding soft, uneven, or sloped surfaces․ Outriggers are crucial for distributing weight and enhancing stability, but require firm footing․ Always use leveling jacks to compensate for minor inclines․
Compacted surfaces are ideal, and mats may be necessary to protect sensitive flooring․ Avoid operating near excavations or obstructions․ Regularly check for ground settling during operation, and be mindful of potential hazards like underground utilities․
Specific Applications of Cherry Pickers (Construction, Maintenance, etc․)
Cherry pickers excel in diverse applications․ Construction sites utilize them for building facade work, installing cladding, and reaching elevated areas․ Maintenance crews employ them for streetlight repair, powerline access, and tree trimming․ Warehousing benefits from their ability to reach high shelving․
Event setups use them for lighting and banner installation․ Film production relies on them for camera positioning․ Understanding the specific demands of each application is vital for selecting the appropriate lift and adhering to safety protocols․

Troubleshooting Common Issues
Common cherry picker problems include hydraulic failures, causing jerky movements or inability to elevate․ Electrical issues can affect controls and safety systems․ Tire punctures or instability pose significant risks․ Boom malfunctions may hinder extension or retraction․
Regular inspections, as detailed in guides, help prevent these․ Troubleshooting often involves checking fluid levels, inspecting wiring, and ensuring proper tire inflation; If issues persist, qualified technicians should perform repairs to maintain operational safety and prevent accidents․
Resources & Further Information (Links to Relevant Websites)
For comprehensive safety guidance, explore the Engineering Construction Industry Association (ECIA) resources․ Manufacturer websites like Concord Access Solutions and WHC Hire Services offer detailed manuals and safety data․ Occupational Safety and Health provides downloadable method statements and SWPs․
Construction Digital offers insights into health and safety standards․ Search for “cherry picker safety PDF” to find additional guides․ Always prioritize official sources for accurate and up-to-date information regarding safe operation and compliance․