
Creality Ender-3 V3 SE User Manual⁚ A Comprehensive Guide
This guide provides a complete overview of the Creality Ender-3 V3 SE 3D printer. Learn about setup‚ operation‚ maintenance‚ troubleshooting‚ and firmware updates. Access various resources including online manuals and downloadable PDFs. Explore detailed specifications and features for optimal printing.
Accessing the Ender-3 V3 SE Manual
Locating your Creality Ender-3 V3 SE user manual is straightforward. The primary method is via Creality’s official website. Navigate to their support or download section‚ usually accessible from the homepage. Search for “Ender-3 V3 SE” or the specific model number. You’ll find the manual available as a downloadable PDF file‚ often in multiple languages‚ including English. Ensure you download the latest version for the most up-to-date information and safety guidelines. Alternatively‚ some users report finding a basic manual on an SD card included with the printer; however‚ this may not be comprehensive. Third-party websites may also offer the manual‚ but always verify authenticity and download only from reputable sources to avoid potential malware or outdated instructions. Remember that accessing the official Creality manual guarantees accuracy and ensures you have the most current version‚ crucial for optimal performance and troubleshooting. Should difficulties arise‚ contacting Creality’s support team directly will provide assistance and resolve any access issues promptly.
Downloading the PDF Manual
Downloading the Creality Ender-3 V3 SE PDF manual is a simple process. Begin by visiting Creality’s official website. Locate their support or downloads section; this is usually easily accessible from the homepage. Search for “Ender-3 V3 SE” or your printer’s exact model number to ensure you obtain the correct manual. Once located‚ click on the link to download the PDF file. The file size may vary‚ but it’s generally quite manageable. Before downloading‚ ensure you have sufficient space on your device. After the download completes‚ locate the saved file; it will typically be in your downloads folder or a designated location you selected during the download process. Open the PDF file using a suitable PDF reader application (such as Adobe Acrobat Reader‚ which is free and widely available). The manual should open‚ allowing you to view and print the instructions as needed. Remember to check for the latest version available on Creality’s site. Always download from the official source to ensure you have the most accurate and up-to-date information. Downloading from unofficial sites may lead to outdated or incorrect instructions.
Online Versions and Manuals
Beyond the downloadable PDF‚ Creality often provides online versions of their Ender-3 V3 SE user manual. These online manuals offer several advantages. Firstly‚ they are readily accessible‚ eliminating the need for downloading and storage. Secondly‚ online versions are often updated more frequently than downloadable PDFs‚ ensuring users always have access to the latest information and any revisions or corrections. Creality’s official website is the primary location to find these online manuals; Look for a support or documentation section‚ often linked prominently on the homepage. Navigating to the Ender-3 V3 SE product page should reveal links to online documentation. The online manual may be formatted for easier online reading‚ with features like interactive elements or better search functionality than a standard PDF. Some users may find online manuals easier to navigate‚ particularly when needing to quickly locate specific instructions or troubleshooting steps. However‚ keep in mind that reliable internet access is required to view online manuals. While the official Creality site is the best option‚ third-party sites may also host copies. Always exercise caution when using alternative sources to ensure the credibility and accuracy of the information provided. Checking the source’s reliability is crucial to avoid potential misinformation.
Firmware Updates and Downloads
Regular firmware updates are crucial for optimal performance and to address any bugs or compatibility issues with your Creality Ender-3 V3 SE 3D printer. These updates often include improvements to printing speed‚ accuracy‚ and overall stability. They may also introduce new features or enhance existing functionalities. To download the latest firmware‚ visit Creality’s official website. Navigate to their support or download section‚ usually easily accessible from the homepage. Locate the Ender-3 V3 SE product page‚ which should contain a link to firmware downloads. You’ll likely find different firmware versions listed‚ possibly categorized by date or feature set. Choose the most recent stable release unless you have a specific reason to select an older version. Download the firmware file‚ typically a ZIP archive containing the necessary files. The manual will provide detailed instructions on how to install the new firmware onto your 3D printer. The process usually involves using an SD card to transfer the firmware files to the printer’s control board. Always back up your current firmware before updating. This allows reverting to the previous version if issues arise after the update. Carefully follow Creality’s instructions to avoid damaging your printer during the update process. After installation‚ test your printer to ensure everything is functioning correctly. Regularly check Creality’s website for new firmware releases to keep your Ender-3 V3 SE running smoothly and efficiently.
Troubleshooting Common Issues
This section addresses frequently encountered problems with the Creality Ender-3 V3 SE 3D printer. One common issue is inconsistent layer adhesion‚ often caused by a poorly leveled bed or insufficient bed temperature. Ensure your bed is properly leveled using the printer’s auto-leveling feature or manual adjustments as described in the manual. Check that the bed temperature is appropriate for the filament being used. Insufficient extrusion can result from clogged nozzles or incorrect filament feed settings. Try cleaning the nozzle with a needle or replacing it if necessary. Review the filament feed settings in your slicer software and ensure they are correct for your specific filament type. If prints warp or peel off the bed‚ try using a glue stick‚ hairspray‚ or other adhesion promoters. Make sure your bed is clean and free of debris. Inconsistent print quality can stem from various causes‚ including incorrect nozzle temperature‚ inconsistent filament feeding‚ or vibrations during printing. Check your nozzle temperature‚ ensure proper filament flow‚ and minimize external vibrations. If your X-axis or Y-axis shows unusual movement‚ check the belts for tightness and alignment. Review the manual’s instructions on belt tension and adjustment. Finally‚ consult Creality’s official support resources or online forums for assistance with more complex problems. The online community offers extensive troubleshooting tips and solutions contributed by fellow users. Remember to always consult the user manual for specific instructions and detailed steps for resolving these issues. Safety precautions should be taken when troubleshooting hardware issues.
Assembly and Setup Instructions

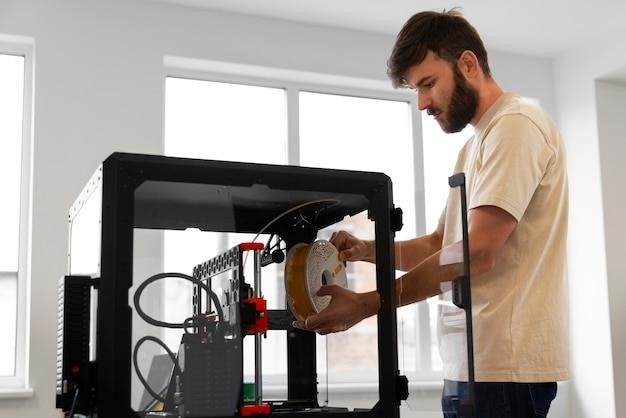
The Creality Ender-3 V3 SE 3D printer’s assembly process is generally straightforward‚ though careful attention to detail is crucial. Begin by unpacking all components and verifying their presence against the provided parts list. The assembly typically starts with the frame‚ attaching the various components such as the Z-axis‚ X-axis‚ and Y-axis. Secure all screws and ensure the components are firmly attached. Install the heated bed‚ taking care to connect the wiring correctly. Next‚ attach the extruder assembly‚ including the nozzle and filament feeder. Double-check all wiring connections before proceeding. The installation of the control board and display screen usually follows‚ connecting the various cables according to the labeled ports. The display screen provides a user interface for controlling various print parameters. Once the physical assembly is complete‚ proceed with the initial setup. This involves leveling the print bed to ensure optimal print adhesion. The Ender-3 V3 SE may feature an auto-bed leveling system‚ simplifying this process. However‚ manual leveling might still be required for fine-tuning. Install the appropriate filament‚ usually PLA‚ ensuring it is properly loaded into the extruder. Power on the printer and follow the on-screen instructions to complete the setup and calibration procedures. Familiarize yourself with the printer’s user interface and menu options‚ allowing for easier control and navigation during printing. Consult the user manual for detailed‚ step-by-step instructions with diagrams and images for each step of the assembly and setup process.
Printer Specifications and Features
The Creality Ender-3 V3 SE boasts a range of features designed for reliable and high-quality 3D printing. Key specifications include a sizable build volume‚ allowing for the creation of larger and more complex prints. The printer’s sturdy frame ensures stability during operation‚ minimizing vibrations and enhancing print accuracy. A crucial feature is the inclusion of a removable and flexible magnetic print bed‚ simplifying print removal and improving adhesion. The Ender-3 V3 SE often incorporates a silent motherboard‚ reducing noise levels during printing. This contributes to a quieter and more comfortable printing experience. Material compatibility is another significant aspect‚ with the printer generally supporting a wide variety of filaments‚ including PLA‚ ABS‚ TPU‚ and PETG. This versatility allows for diverse project possibilities and exploration of different material properties. The user-friendly interface‚ often featuring a responsive LCD screen‚ makes operation intuitive for both beginners and experienced users. The printer’s design emphasizes ease of use and accessibility. Precise control over printing parameters‚ including temperature‚ speed‚ and other settings‚ is usually achievable through the user interface or via slicing software. Many models include features like auto-bed leveling‚ which significantly simplifies the setup and calibration process. The Ender-3 V3 SE typically offers a balance of affordability and performance‚ making it a popular choice among hobbyists and professionals alike. Regular firmware updates from Creality often enhance functionality and address any potential issues‚ ensuring optimal performance over time. Detailed specifications‚ including print area dimensions‚ nozzle size‚ and power requirements‚ are typically found in the accompanying user manual.
Operating the Printer⁚ A Step-by-Step Guide
Operating the Creality Ender-3 V3 SE involves several key steps. First‚ ensure the printer is properly assembled and leveled. Prepare your chosen filament‚ ensuring it’s correctly loaded into the extruder. Then‚ use the printer’s control panel or slicing software to select the desired print settings‚ including temperature‚ speed‚ and layer height. These settings are crucial for achieving optimal print quality and depend on the filament type being used. Next‚ prepare your 3D model file using slicing software to generate G-code instructions that the printer understands. The choice of slicing software is flexible and depends on user preference. After the G-code is generated‚ transfer it to the printer via an SD card or through direct connection if supported. Start the printing process using the printer’s controls. The printer will automatically heat up to the specified temperatures and begin extruding filament layer by layer. Monitor the printing process‚ addressing any anomalies that may occur. Common issues might include filament jams‚ layer adhesion problems‚ or nozzle clogs. Consult the troubleshooting section of the manual if such issues arise. Once the printing is complete‚ carefully remove the finished print from the print bed. Allow the print to cool completely before handling to avoid warping or damage. After each print‚ perform basic maintenance‚ such as cleaning the nozzle and print bed. This ensures the longevity and performance of your 3D printer. Regular maintenance is essential for consistent‚ high-quality results.
Maintenance and Care Tips
Regular maintenance is key to ensuring your Creality Ender-3 V3 SE 3D printer delivers consistent‚ high-quality prints. Begin by cleaning the nozzle after each print session. Accumulated residue can affect print quality and lead to clogging. Use a specialized nozzle cleaning tool or a brass brush to remove any filament buildup. The print bed also requires periodic cleaning. Remove any residual filament or debris using a scraper or spatula. Avoid using harsh chemicals or abrasive materials that could damage the print bed surface. Regularly inspect the extruder for signs of wear and tear. Check for loose screws‚ damaged components‚ or filament jams. Tighten any loose screws and replace damaged parts as needed. Lubricate moving parts such as the Z-axis screws and linear rails to reduce friction and ensure smooth operation. Use a high-quality lubricant designed for 3D printers. Keep the printer’s internal components clean and free of dust and debris. Use compressed air to remove dust buildup in hard-to-reach areas. Always unplug the printer from the power source before performing any maintenance tasks. This is a crucial safety precaution to prevent electrical shocks. Store your filament properly in a cool‚ dry place to prevent moisture absorption‚ which can degrade the filament and affect print quality. Use airtight containers with desiccant packets to maintain optimal filament condition. Finally‚ regularly check and update the printer’s firmware to ensure you have access to the latest features‚ bug fixes‚ and performance improvements. Following these maintenance tips will extend the lifespan of your Ender-3 V3 SE and ensure you get the best possible prints every time.